Thursday, July 31, 2014

Damask Diva's August Blog Hop- Chalk It Up

Hello Friends,

  Welcome to the Damask Diva's Chalk It Up Blog Hop


My name is Sarah Gardner and I'm an Independent Consultant with Close To My Heart.

If you came from Stephanie Davis , you are in the right place.  If you have jumped here and just discovered our blog hop, feel free to check the list at Damask Divas blog to find the complete list of blog hop participants


Today I have a post it note easel card.  The Chalk It Up paper has a school theme to it so I thought why not a Back to School design to the easel card.

When putting the card together I was having some issues with the White ink, for some reason it was just not working with me, then after stamping the image I flipped the cardstock over to glue it and smeared the ink as there were a few ink blobs on the cardstock. Normally I would have redone the stamping but for this project with the chalkboard look to it, I kind of liked the smeared look and thought it made it look like a real chalkboard, so I decided to leave it. Sometimes mess up do work out.

anyway the frame to my chalkboard is make with kraft cardstock and a wood grain stamp.


I got this idea from another CTMH consultant that made a chalkboard card and I have to apologize because I dont remember her name, I like to give credit where I can, but I saw it on Facebook and couldn't find it again to give her the credit.


I found the directions for the post it easel card on a YouTube video again I want to give the Credit where its due. I did my own version of the card she posted. 

Supplies used
Circus Alphabet, July stamp of the month

I really hope you enjoyed my project and I hope it inspires you to make something great today.

 The next blog on the list is Jamie Blades. Hope you have a great time on our hop and checking out all the creations using Chalk It Up Paper. If you get lost, just hop on over to The Damask Diva's Blog Hop for the full list.

Tuesday, July 29, 2014

Simple Thanks Cake Card

Hello Friends,


Today I have another simple Thanks card. This card can be changed pretty easily to meet any need you may have. The "thanks" is stamped with this months stamp of the month set. I know that alphabet stamp sets can be a little scary but once you try it you will see that they are pretty simple to use. 


I'm loving how easy it is to make cards using the card and envelope set from CTMH. If you get the value pack, it works out to only 30 cents for each set. Then all you have to do is some simple cuts and stamps and the card is done.


The tag was cut from Close To My Hearts, Art Philosophy cartridge. The cake was cut from the celebrate flourishes cricut cartridge, I didn't want the swirls on the cake as I wanted to decorate it myself so i cut the base cut twice and then just hand cut the cake part out. I inked the edges of the blue cake just to give it that little bit of dimension.  Now here is where you can alter the card a little to meet your needs. You could easily but a present if you want to thank someone for attending a party, or a flower cut out for a more general thank you card.


Thank you for stopping by and checking out my blog. I hope I have inspired you to create something great today.

Supplies used:
Lollydoodle Paper pack- now retired 
July Stamp of the Month  hurry this is only available for a few more days

CTHM has a new Cartridge coming out soon that is focused on Card making.

July Stamp of the Month only $5 with a $50 purchase, only available during the month of July.


Thursday, July 24, 2014

Simple Thanks Card

Hello Friends

Today I have a simple Thank You card using the July Stamp of the Month and some of my left over paper.

I used the CTMH Artbooking cartridge to make the speech bubble. I used the hide contour button to remove the two holes as the cut is designed to be a page in a mini album.


I stamped the "Thanks" in two different colors. First I lined up the stamps the way I wanted it then simply removed every other letter stamped in one color, then went back and did the same thing but removed the opposite letters to stamps the remaining letters. I also inked around the edge of the speech bubble.

I used a simple stamp greeting on the inside of the card and added a 1/2 inch strip of the same cardstock that is on the front, both at the top and bottom of the inside of the card.

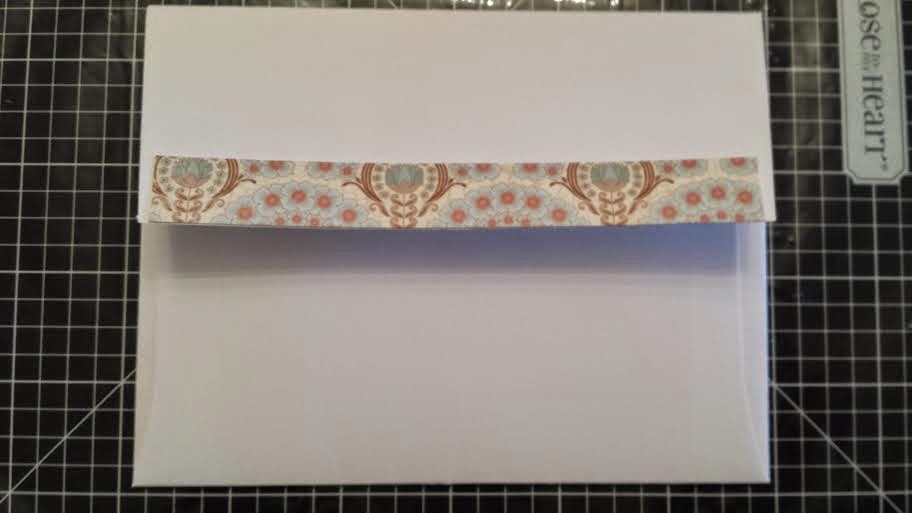
Last I added a strip of the same Cardstock to the back of the envelope.


I hope I have inspired you to make something great today.

Supplies used:
I used Sky ink which has retired but you could use Crystal Blue ink
Always Grateful- retired stamp set
White Daisy Card and Envelope pack
White Daisy Cardstock 

July Stamp of the Month only $5 with a $50 purchase 

The new Close To My Heart Artfully Sent Cartridge which is suppose to come out sometime in August.


Monday, July 21, 2014

Speed Limit Birthday Cake


 Hello Blogger Friends


Today I have a cake that I made using my cricut. My mom recently turned 55 and she wanted a speed limit party. This is over all a pretty simple job but I wanted to show some of the versatility of the Cricut.


I made a speed limit sign for decoration then took the negative space to cut it out with fondant. 

This project was pretty simple but just wanted to share the idea. I hope it has inspired you to make something great today.

July Stamp of the Month  just $5 with a purchase of $50


Friday, July 18, 2014

Balloon Birthday Box Card

Hello Friends


Today I have another box card for you from SVGCUTS. The balloon box makes a wonderful birthday card.


I embossed the papers for an added touch. I also inked the edge of the balloons to give them the 3d look. I taped bakers twine on the back and tied it down to look like real balloons.


I stamped the bottom of the envelope with a happy birthday stamp.


I hope this has inspired you to make something great today.

Supplies used:

July Stamp of the Month just $5 with a $50 purchase

Tuesday, July 15, 2014

"Sunny" Thank you card

hello bloggers,


Today I have a thank you card that I made using the "Sunny" svg. I'm kind of a sucker for sunflowers.
Here is the inside of the card.

The border on the bottom was just the negative space from the leaves that are on Sunny on the front of the card. I thought it worked nicely as a border so I just cut a strip to fit the length of the card.

 I also stamped the back and the front of the envelope to match the card.
To do this on the front corner, I laid a piece of scrap paper under my envelope and stamped so that only a portion of the stamp would show up on the envelope.

Items used on this card.
Ariana workshop on the go kit which is retiring soon
For every Occasion stamp set which is retired
cc1014 stamp set which is retired 
Friendship bouquet stamp set which is retired

 July Stamp of the Month  $5 with Qualifying purchase
New Close to My Heart Cricut cartridge coming soon...


Thanks for stopping by, as always, I hope I have inspired you to make something.

Friday, July 11, 2014

Side Step Sympathy Card

Hello Blog Friends,


Today I have a side step sympathy card for you. I made using the Ivy Lane workshop on the go kit. I made the card using a cut file for the Cricut Explore. 

First I cut out all my pieces and glued the base of the card together.
  
I stamped my sentiment and inked around the tag with the desert sand ink pad.
Then I also added a sentiment to the bottom corner of the envelope. 

What I used for this project
Art Philosophy cartridge  for the Butterflies and the tag
Words of Comfort Stamp set  which is retiring soon.
and

Thank you so much for stopping by and I hope I have inspired you to create something of your own.


July Stamp of the Month  only $5 with qualifying purchase

Tuesday, July 8, 2014

Down Syndrome Earrings

Hello Friends,

Today I have some earrings that I made with my Cricut. They have this as a make it now project thru the Cricut design space, and I saw a wonderful YouTube video by Melody Lane on how to make them.

I chose to make awareness ribbons for Down Syndrome but really you could make just about anything.
I used the ribbon from the Designer's Calender cartridge which is available thru the subscription  and can be made with any Cricut machine.  The circle I used is from the craft room basics, but again you could use any circle. I welded the ribbon and Circle together the form the shape I wanted.


I used CTMH Daisy White Cardstock and cut out 10 images, This gave me enough to layer and make the earring a little sturdier.
I ended up using only 4 layers on each earring. After gluing them together I colored them in using Copic markers. Once they were dry, I coated them 3 times with Mod Podge. The earring loops I had bought from Joann's.


Thank you so much for Checking out my blog. I hope this has inspired you to try out your own jewelry with your Cricut or other die cut machine.


Items I used are White Daisy Cardstock


July Stamp of the Month just $5 with a qualifying purchase